Design Your Own Cross Stitch Pattern
Design Your Own Cross Stitch Pattern
Co-Founder & Lead Developer
Designing your own cross stitch pattern lets you create something completely unique. Whether you want a custom gift, original artwork, or a pattern no one else has, here's how to get started.
Two Approaches to Pattern Design
From Scratch
Start with a blank grid and place each stitch yourself. This gives you total creative control and works best for original designs, text, and geometric patterns.
From an Image
Start with a photo or illustration and use a pattern maker to convert it into a chart. This is faster and works best for realistic or complex designs.
Most designers use a combination of both — generating a base pattern from an image and then customizing it by hand.
Planning Your Design
Before placing any stitches, decide on:
Size
How big should the finished piece be? Work backwards from your desired dimensions and fabric count:
- Finished width = stitch count / fabric count
- A 70-stitch-wide pattern on 14-count fabric = 5 inches wide
Color Palette
Limit yourself to a manageable number of DMC colors. For original designs, 5-15 colors is usually plenty. Pick colors that work well together by referencing the DMC color card.
Subject and Style
Sketch a rough idea on paper first. Decide if you want a realistic look, a stylized graphic, pixel art, or something abstract.
Design Tips
Start Simple
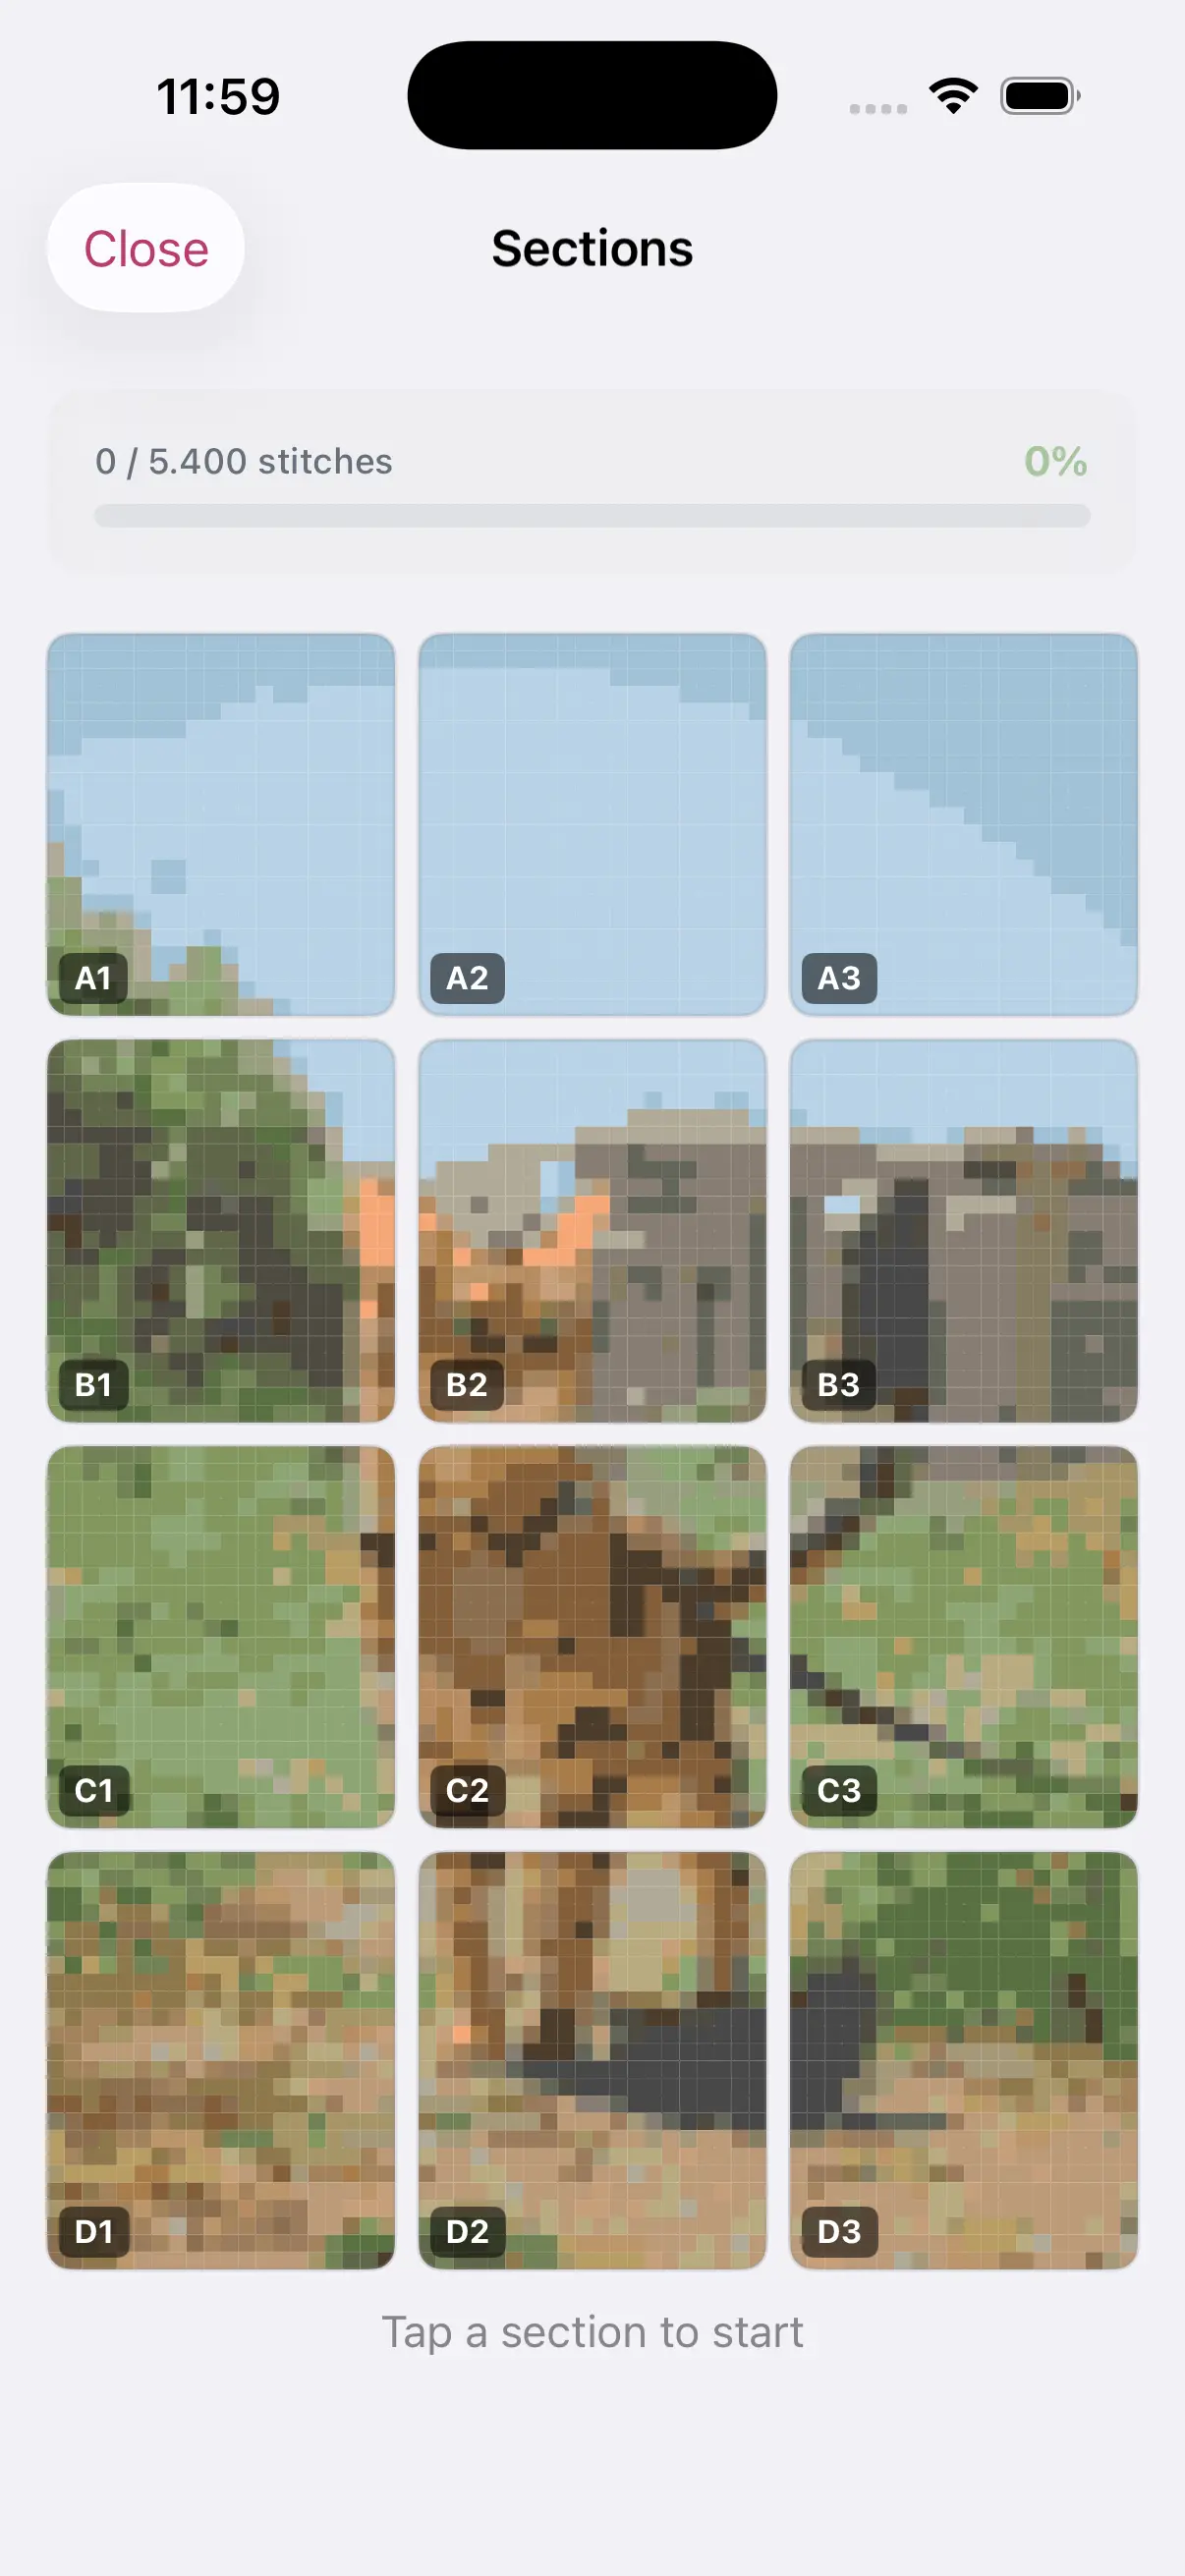
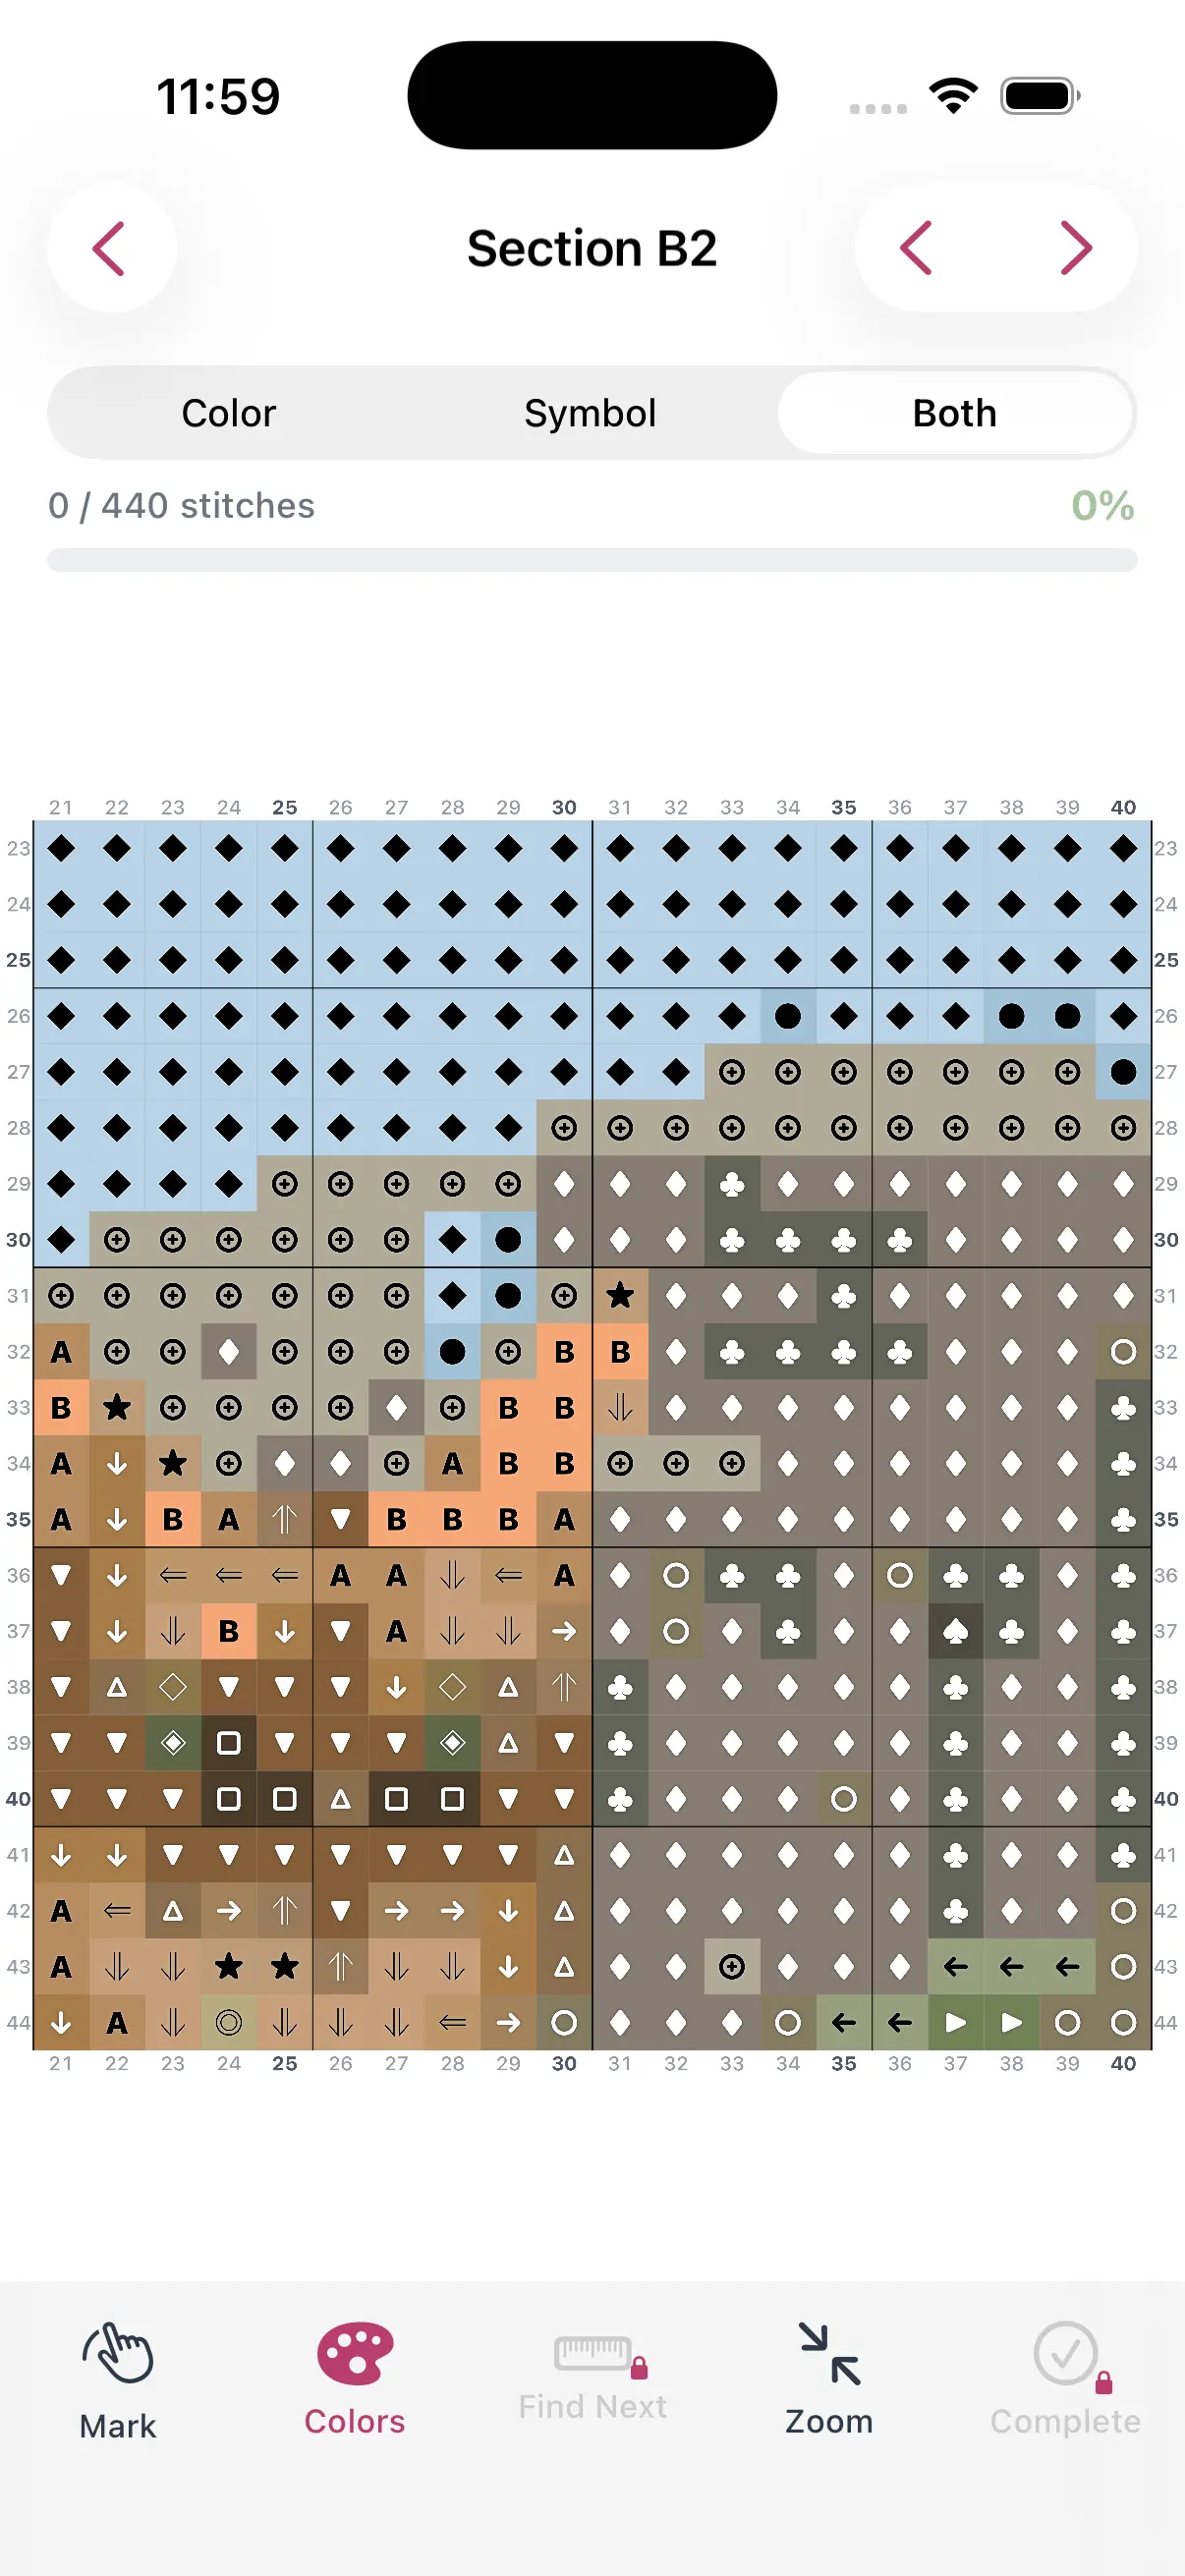
Turn Any Photo Into a Cross Stitch Pattern
- Accurate DMC color matching
- Track progress stitch by stitch
- Export print-ready PDF charts
iPhone & iPad
Your first original design should be small (30x30 stitches or less) with few colors. A simple motif, monogram, or small icon is perfect for learning.
Use a Grid
Graph paper or a digital grid is essential. Each square equals one stitch. Color in squares to build your design cell by cell.
Think in Blocks
Cross stitch is inherently blocky. Curves and diagonals look different on a grid than on paper. Preview your design at actual stitch scale to see how it will really look.
Consider Negative Space
The fabric color is part of your design. White or natural Aida cloth becomes the background, so leave strategic areas unstitched for an open, airy feel.
Combining Generated and Custom Elements
A powerful workflow for creating unique patterns:
- Use StitchCraft to generate a base pattern from a photo
- Edit the generated pattern to clean up details
- Add custom borders, text, or decorative elements
- Adjust the color palette to your preference
- Export the final design as a PDF or stitch from the app
This approach is especially good for personalized gifts — generate a pet portrait, then add the pet's name and a custom border.
Common Design Mistakes
- Too ambitious — Start small before attempting large or complex designs
- Too many colors — Complexity grows fast with each added DMC color
- Ignoring the grid — What looks good on paper may not translate to cross stitch
- No test stitch — Stitch a small section before committing to a large project
Sharing Your Designs
Once you've created a pattern you love, you can:
- Export as a PDF to share with friends
- Print for your own reference
- Use the progress tracker to stitch it yourself
Designing your own cross stitch patterns is rewarding and gets easier with practice. Start with a simple project, learn how stitches translate from grid to fabric, and build from there.